

CSS Selectors 101: Targeting Elements with Precision
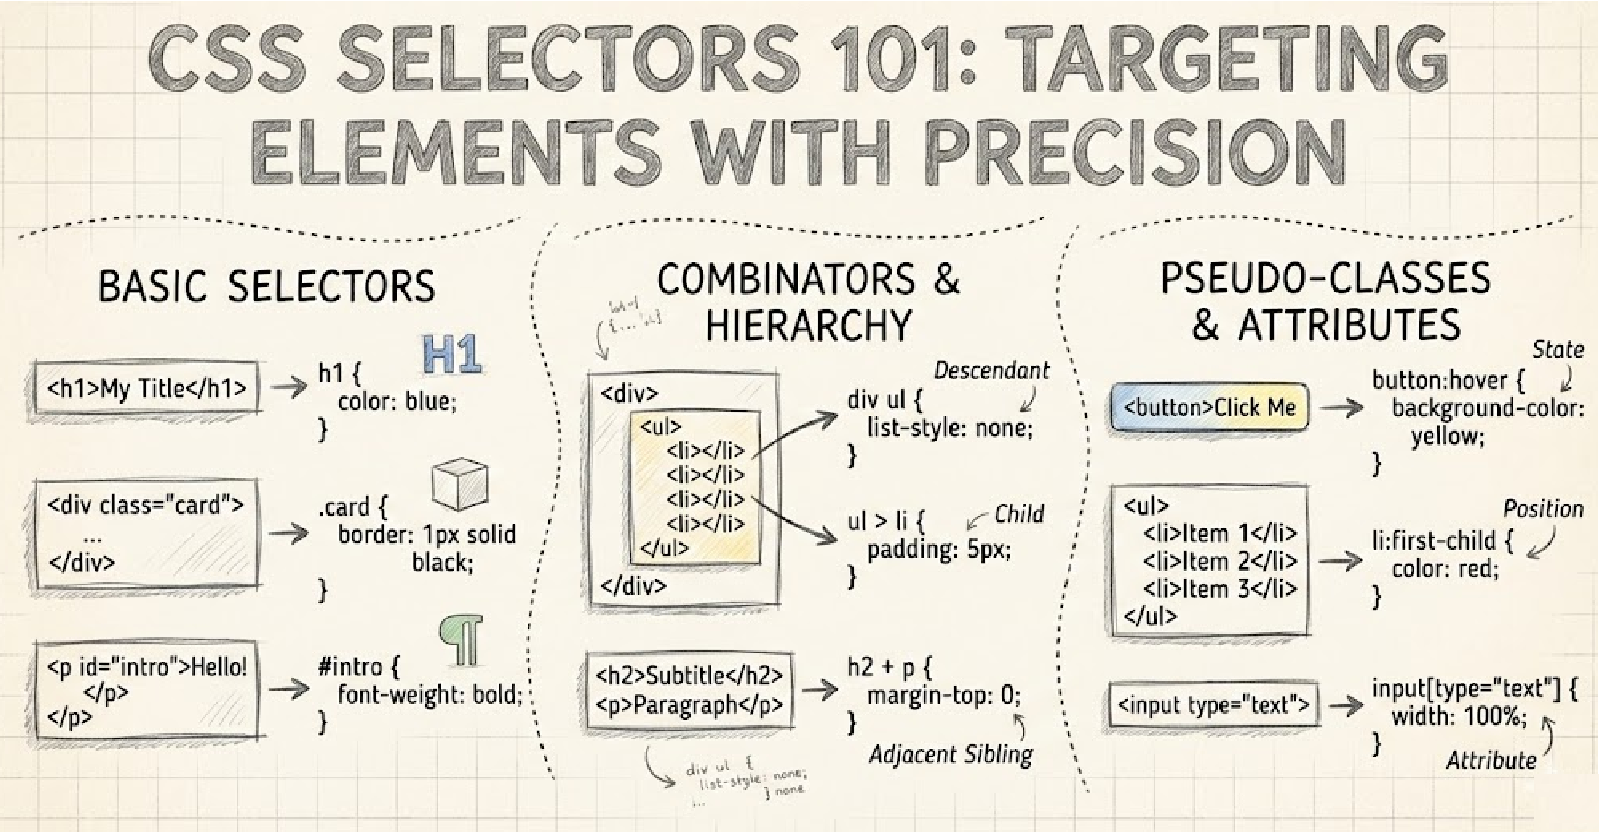
Why CSS selectors are needed
CSS selectors are needed because they tell CSS exactly which HTML elements to style.
Without selectors, CSS would be like saying “make it blue” without saying what should be blue
CSS needs a target
HTML creates the structure (buttons, headings, paragraphs).CSS controls how those things look. Selectors are the bridge between them.
 p {
   color: blue;
 }
Here:
pis the selectorIt tells CSS: “Apply this style to all
<p>elements”
Different elements need different styles
A real webpage has many elements:
Headers
Buttons
Links
Forms
Cards
Navigation bars
Without selectors, CSS wouldn’t know where to apply styles.
h1 { font-size: 32px; }
button { background: green; }
a { text-decoration: none; }
Without selectors → everything would look the same
style only what you want
Selectors allow fine control.
You can target:
All elements of a type
A specific element
Elements inside other elements
Elements in a certain state (hover, focus)
Clean & reusable styling
Instead of repeating styles everywhere:
 <p style="color:red">Hello</p>
 <p style="color:red">World</p>
You use selectors once:
 .error {
   color: red;
 }
Selectors help keep CSS:
DRY (Don’t Repeat Yourself)
Easier to maintain
Easier to update later
They power modern layouts & UI systems
Advanced selectors make modern web design possible:
Component-based styling
Responsive design
Dark mode
State-based UI (hover, active, disabled)
    .navbar > ul > li.active a {
      color: white;
    }
This level of control is only possible because selectors exist.
CSS selectors are needed because they:
Tell CSS which elements to style
Allow precise and controlled styling
Prevent unwanted side effects
Enable reusable, maintainable design
Make complex UIs possible
Element selector
An element selector targets HTML elements by their tag name and applies styles to all elements of that type on the page.
Basic syntax
elementName {
  property: value;
}
Example:
p {
  color: blue;
}
CSS scans the HTML and says: Find all elements with this tag name, then apply these styles.
Common element selector examples
h1 {
  font-size: 32px;
}

button {
  background-color: green;
  color: white;
}

ul {
  list-style: none;
}

a {
  text-decoration: none;
}
Each rule applies to every matching tag.
When should you use element selectors?
Base styles (fonts, spacing, resets)
Global typography
Simple or small projects
Class selector
A class selector lets you style specific elements by using their class attribute.
It’s more flexible than element selectors and is the backbone of real-world CSS.
Basic syntax
.className {
  property: value;
}
Example:
.highlight {
  color: red;
  font-weight: bold;
}
<p class="highlight">Important text</p>
Only elements with class="highlight" get styled.
How it works
CSS looks for any element that has the given class name —
it doesn’t care what tag it is (p, div, span, etc.).
<p class="box">Paragraph</p>
<div class="box">Div</div>
<span class="box">Span</span>
.box {
  border: 1px solid black;
}
Why class selectors are powerful
✅ Reusable (use same class many times)
✅ Precise (no global side effects)
✅ Works with any element
✅ Perfect for components (cards, buttons, alerts)
Multiple classes
An element can have more than one class:
<button class="btn primary large">Save</button>
.btn { padding: 10px; }
.primary { background: blue; }
.large { font-size: 18px; }
Targeting a specific element with a class
You can combine element + class:
p.note {
  color: gray;
}
Group selectors
A group selector lets you apply the same CSS rules to multiple selectors at once by separating them with commas.
Basic syntax
selector1, selector2, selector3 {
  property: value;
}
Example:
h1, h2, h3 {
  font-family: Arial, sans-serif;
}
Grouping different selector types
You can mix element, class, and ID selectors in one group:
p, .note, #warning {
  color: red;
}
Applies to:
All
<p>elementsAll elements with class
noteThe element with id
warning
Real-world examples:
input, textarea, select {
  border: 1px solid #ccc;
}

.btn, .link-btn, a.button {
  padding: 10px 16px;
}
Perfect for:
Form elements
Button-like components
Headings
Reset styles
Descendant selectors
A descendant selector targets elements that live inside another element, no matter how deep they are nested.
Style this element, but only when it is inside that element.
Basic syntax
ancestor descendant {
  property: value;
}
Example:
div p {
  color: blue;
}
Styles all <p> elements inside any <div>
How it works
Given this HTML:
<div>
  <section>
    <p>Hello</p>
  </section>
</div>

<p>Outside</p>
div p {
  color: blue;
}
Result:
“Hello” → blue (inside div)
“Outside” → unchanged
Basic selector priority (very high level)
When multiple CSS rules target the same element, the browser needs to decide which one wins.
That decision is based on selector priority.
The simple priority order:
From lowest → highest priority:
- Element selector
p { color: blue; }
- Class selector
.text { color: green; }
ID selector
#main { color: red; }
ID > Class > Element


